As you would expect,
we got lots of curious stares and several thumbs up during the
trip.....and one guy in a late- model Camaro seemed to be struggling
with how to react.
|
On the way to the
body shop, we happened upon a serious accident. Yikes! Hope this isn't
an omen. |

|
 |

|
 |

|
 |
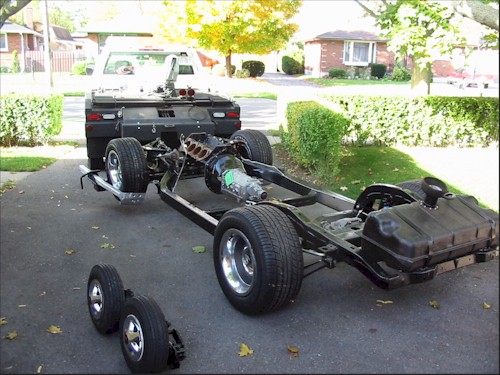
Yes, those really are
P295-50R15 tires on 10" wide rims under those rear fenders. The
tread on these is double the width
of the original tires. |
 |
Here's a look down the
passenger side. With a complete big block, hood, grill and lots more,
the front should drop about 1.5" and 2". Hmmm, I think we can
go wider rims on the front, don't you; but will I be able to turn the wheels
without power steering? |
 |
During this test
drop, I decided to grab a few photos from underneath. The car will be
painted body colour underneath, as well. The yellow you're seeing is
primer. |
 |
Hmmmm. Can't wait to
try all this new stuff out.
 |
 |
The front floor pan is
still to be cleaned up and primed after the test body fit is completed.
An experienced eye will reveal that the seat mount brackets and
reinforcements are absent. So are the seat belt reinforcement plates. |


|
Many new brackets and
reinforcement pieces are going in.
Why?
Moisture got into the car during
storage and most of the interior brackets, bolts, nuts and screws turned
to rust. Many bolts had to be drilled out and several metal pieces were
damaged in the process.
Simple truth.....I was careless
in my storage method, but I'm a big boy now.  |
|

All eight body
mounts, washers, bolts, etc. are new.
|

Here's a look at the cushion assemblies.
|

This is a
view of the #3 driver's side mount
in the rear wheel-well compartment. |

These clips and screws are used to
mount the metal access doors that cover the #3 body mounts in front of
the rear wheels (see left).
|
|
Thanks to helpful
information from JohnZ, Dave65
and others (http://www.CorvetteActionCenter.com),
we found the correct tool for setting the aluminum rivets used to attach
many metal reinforcement plates and brackets (see above) to the
fiberglass body. The gun is a typical air hammer, but the actual tool
with a concave end is by Chicago Pneumatic #A046089
(Set-Rivet.25RD.401SH) and is shown leaning up against the box in the
photo to the right. Click on the photo to enlarge.
|

|
|

I got a new short block under
warranty in late 1968. While waiting for the replacement
block, the mechanic "set" (not bolted) the hood back on
and pushed the car outside overnight.
Was the hood there in the morning? What do you think? The
replacement hood had a wow
from day one,
but that's being fixed right now......35 years later.
|
 |

Following the first hi-build prime
coat, the application of 3M Dry Guide Coat powder reveals pin-holes and
hard-to-see marks on the body that require further attention.
|
 |
 |
|
 |
|
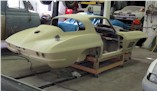
Now that the
doors, hood and valance are fitted, we placed the body back
on the wooden dolly. Following block sanding and some minor details,
it'll be back into the paint booth for final prime and paint.
|